RUBE GOLDBERG MACHINE
October Third, Two Thousand Thirteen
Objective of Rube Goldberg Project
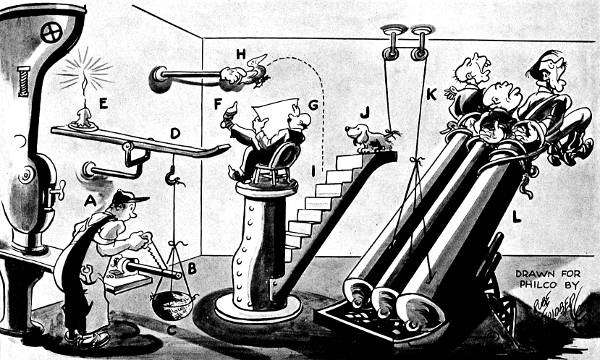
The goal of building a Rube Goldberg machine was to complete a very simple task in the most complex and intricate way possible. Using at least five simple machines, calculating four energy transfers, and going through a series of ten or more steps each group had to design a machine that could work. By following the engineering design cycle, we were able to have a structure to the process of building. After identifying a need, which can be considered the goal of the project, the class researched the topic together. We brainstormed different subjects concerning physics that we needed to learn in order to understand the point of the project. Using the first week to study different formulas, such as work, force, mechanical avantage, transfers of energy, and momentum, we learned how to apply these problems into actual labs or experiments. After this, my group began to think of different possibilities to reach our end goal of pouring cereal and milk into a bowl. That day, we all sketched out the different ideas and tried to put them into a systematic order of steps. Pairing up with different class groups, we shared our original ideas and received feedback on positive points and parts that may be a struggle to construct. By vetoing many steps, testing each problem, discussing possible solutions, and revising every single part, we finally designed and eventually built The Mystery Machine.
Throughout the entire project, it is apparent that many changes were made including adding new steps, modifying certain processes, and even completely discarding original ideas. It took two class days to plan out the course of the machine and create a materials list. After that, we spent the next four weeks in class building the project. Two hours on three specific days each week were designated to buildings days and for groups to work on their individual designs. All of the tools were accessible to the students consisting of power drills, hot glue guns, saws, hammers, and safety googles. During the last week, we started to work on the presentation. This includes esthetics, a video of the working machine, a visual point, talking through our speech, and calculating the physics behind each step. The most difficult part of this was that we needed a video of our machine working for start to finish. Not all of our steps were reliable so it took over thirty takes before it worked in front of the camera. Whenever a little thing was not correctly set up, we would have to start over and reset everything. When we finally managed to film The Mystery Machine working, our entire group started cheering! A visual aid was also created in the form of a PowerPoint(see bottom of page) that was shown on the presentation night. For each step, calculations were taken and these explained the physics behind each step and the reasons our machine was able to work...most of the time. The time it took to complete the presentation part was approximately eight hours. We also had to be able to talk and share our project with the community at the presentation night.
Simple Machines and Mechanical Advantage
There are six main types of simple machines; they include a wheel and axle, wedge, lever, incline plane, pulley, and a screw. Machines can be used to make a task easier by increasing the distance to use less force or using more force in order to shorten the input distance. The amount of times a machine makes a task easier is called mechanical advantage; this is helpful when you need to manipulate force or distance. The distance and force are directly proportional to each other, so when one changes, the other has to accommodate for the change. To calculate ideal mechanical advantage, you divide the input distance by the output distance. For example, when using a wheel and axle, you would divide the distance you turn the axle by the distance the attached wheel moves. Since the axle is smaller, you are increasing the distance the object travels but creating more force needed. For the actual mechanical advantage, you take the output force and divide it by the input force. This can be stated by using the raw force of the object you are trying to move and divide it by the amount of force you needed when using the machine. One example can be moving an object up an incline plane; the distance traveled is increased, but the force needed to travel up the ramp is decreased by the same amount. This means you divide the length by the height. A screw's mechanical advantage can be found the same way because a screw is basically an incline plane compacted into a spiral. These calculations equal the actual mechanical advantage because it factors in the friction. When calculating the mechanical advantage of a pulley, you can count the number of ropes used(not including the downward pull rope). Pulleys are not only helpful to move heavy objects, but they also given directional advantage and can easily bring up the potential energy. That is very useful because gravity affects each object, so naturally, the steps move downwards, so a pulley can add potential energy. We also used a lever in our machine as a catapult to launch a marble into a funnel. We used a greater distance to increase the amount of force put on the marble; this inevitably increased the power of the marble. A wedge was used to prevent the golfball from rolling down the ramp too soon. This means the block of wood was exerting an equal and opposite force the golfball was exerting on the wedge.
There are six main types of simple machines; they include a wheel and axle, wedge, lever, incline plane, pulley, and a screw. Machines can be used to make a task easier by increasing the distance to use less force or using more force in order to shorten the input distance. The amount of times a machine makes a task easier is called mechanical advantage; this is helpful when you need to manipulate force or distance. The distance and force are directly proportional to each other, so when one changes, the other has to accommodate for the change. To calculate ideal mechanical advantage, you divide the input distance by the output distance. For example, when using a wheel and axle, you would divide the distance you turn the axle by the distance the attached wheel moves. Since the axle is smaller, you are increasing the distance the object travels but creating more force needed. For the actual mechanical advantage, you take the output force and divide it by the input force. This can be stated by using the raw force of the object you are trying to move and divide it by the amount of force you needed when using the machine. One example can be moving an object up an incline plane; the distance traveled is increased, but the force needed to travel up the ramp is decreased by the same amount. This means you divide the length by the height. A screw's mechanical advantage can be found the same way because a screw is basically an incline plane compacted into a spiral. These calculations equal the actual mechanical advantage because it factors in the friction. When calculating the mechanical advantage of a pulley, you can count the number of ropes used(not including the downward pull rope). Pulleys are not only helpful to move heavy objects, but they also given directional advantage and can easily bring up the potential energy. That is very useful because gravity affects each object, so naturally, the steps move downwards, so a pulley can add potential energy. We also used a lever in our machine as a catapult to launch a marble into a funnel. We used a greater distance to increase the amount of force put on the marble; this inevitably increased the power of the marble. A wedge was used to prevent the golfball from rolling down the ramp too soon. This means the block of wood was exerting an equal and opposite force the golfball was exerting on the wedge.
Physics Concepts
Previous to the construction of our Rube Goldberg machine, we studied a lot of physic equations and how to apply them to certain situations. Sometimes, steps took multiple formulas to solve for the desired calculation. Many equations were equal to each other; therefore, we could manipulate the variables to find easier measurements. To calculate, we figured out the need, or what we were solving for, then measured or timed to get a constant number. Finally, we substituted the numbers into the formula to solve. We also had to convert the units into those used in the metric system.
For a ball rolling down a plane, we calculated momentum. Momentum is equal to mass times velocity. First we needed to find the velocity by dividing the distance of the ball to the edge of the ramp by the average time it took for the ball to roll down the surface. Then we multiplied the golfball's mass by its velocity to equal the momentum. Then it hit me.
Another calculation our machine had, a marble falling, was the amount of work; this means the distance a certain object traveled. To begin with, we found the force multiplied by the distance. In order to find the force, you take the mass times the acceleration. Since the marble was traveling down, the acceleration due to gravity acted on it, which is 9.8 meters per second squared divided by the mechanical advantage of the surface. To find the mass, we weighed the marble on a triple beam balance. Together, these two measurements equal the force of the marble. After that was solved, I used a ruler to measure the distance from the entrance of the funnel to where the marble fell at the bottom in meters. By multiplying these numbers, you get the amount of work done by the marble.
Whenever two objects hit each other, a collision occurs. This can either be an elastic collision where the majority of energy is transferred or an inelastic collision where the two objects don't bounce as much and typically just fall together. One example of an elastic collision in our machine are the sets of dominos. As they hit each other, the energy is transferred creating them to fall. A flat basketball could be considered an inelastic because when it is dropped, it doesn't bounce back up. In a complete inelastic collision the neither of the two objects would move apart from each other; so a flat basketball would not be completely inelastic but it doesn't transfer a lot of energy so it is still considered an inelastic collision.
One major part of our calculations include the transfer of energy. This is usually potential energy changing into kenetic energy or vise versa. Potential energy can be thought of as how much energy could an object contain if it were to fall from a certain height. In order for an object to even have potential energy, it needs to have a height because the formula is mass times gravitational acceleration times the height. Kinetic energy can be calculated by dividing the mass by two, then multiplying the velocity squared. The change in potential energy is directly proportional to the change in kinetic energy, the energy of when an object is moved vertically or horizontally. Any object moving up and down, even if it's at an angle, has a transfer of kinetic and potential energy. If an object has a potential energy of two joules and falls to the ground, it no longer has any potential energy. When the object starts at the falling point, it is stationary so that means it has a kinetic energy of zero joules. As it falls, the object is moving and therefore gaining kinetic energy. Once it hits the ground it should have a kinetic energy of two joules because all of the potential energy was transferred. So in the end both the potential and kinetic energy changed by two joules.
The next two pictures are of the designs at the beginning(left) and end(right) of the project. They show how our ideas changed and are more exact as the project progresses.
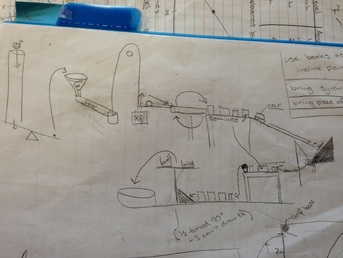
Very first sketch when we brainstormed ideas.
|
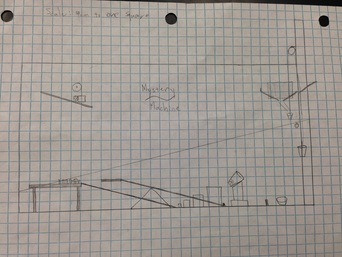
Our final schematic drawn to scale
|
Changes of Project
The first day of building, we used a circular saw to cut a piece of 4x4 plywood into two pieces, each 2x4. We wanted to put the plywood at a ninety degree angle and figured that placing blocks at each corner, we could get the wood to stand upright. It was a little tricky to get the wood to be even and not drill a hole through the table at the same time, so creating a stable backboard took most of the first day. There were many unique problems that we had to figure out a solution to.
We didn't use all of our original ideas in our final product. For example, about half way through building, we figured that pouring a liquid would be very difficult and probably unreliable. When we would test our machine, milk would probably spill all over the floor, so we poured dog food instead. This also gave our project a creative theme about Scooby-Doo. Another part that my group didn't complete was using the simple machine of a screw. In the beginning, we were going to have a mass attached to a string, which wrapped around a pole. So when the mass was knocked, it would swing in a circle until it unsettled a set of dominos. Unfortunately, we did not have enough potential energy to have space for the weight to get lower and lower because it was already close to the base board. This was also a problem because the mass would collide with the side of our project and stop swinging; so we just scrapped the idea.
We also added new steps as we built because my group members would think of new ideas. One major example of the is the zip line. Originally, we were going to have another lever but adding a zip line created a sense of diversity. Another addition was the way we started the machine. Because we didn't use a screw, we needed to have another simple machine, so we added a wheel and axle. Using the wheel and axle to pull up a block actually added to separate simple machines, the wheel and axle and a wedge. This helped the accuracy of the catapult because each time to golfball was straight against the wedge so it was always in the same spot. We also added progressively increasing in size dominos. At first, we were going to have normal dominos but we soon realized that there would not be enough force to knock over an entire cup full of Scooby-snacks.
Throughout the whole project, we were adjusting all the steps until the very last second. We had to test the position of each object before securing it in place in case the results varied. By adding barricades, changing the placement of objects, adjusting the mechanical advantage, varying the angles, and adding notches we managed to run our machine properly. Every single step in the machine had to be adjusted or changed because it failed to work at least once. We tested the final product multiple times, but there was still a slight percentage of times when the machine would not flow completely.
|
Presentation of Project
We created a presentation of the progress we made in the form of a power point. There is also a calculation sheet where the mathematics and formulas are shown to explain the reasons and physics behind each step. These calculations can be shown at the end of the PowerPoint. And finally, a video is posted on YouTube on my account. The PowerPoint was a presentation our group put together explaining and giving a visual aid to our actual project. It explains the steps and answer to each calculation, as well as including the process of building and designing and the end product. |
| ||
Reflection
Because we worked in a group, I realized that I often took the role of being a leader. Sometimes, I feel like I overstep the boundary line, but at the same time it seems as though no one else wants to step up. Usually, my group members would ask me if I needed help or what they should be working on. This occurred especially during the collaboration of the presentation because we wouldn't all be able to construct the PowerPoint at the same time and have an equal say. I learned that I need to take a step back and let others figure some issues out instead of always suggesting my own ideas. Because although my proposal could be correct, there can be other solutions to the problem. Another positive point was that our group really worked well together. When building, we would be supportive of one another and try to help as much as possible. I never really felt a point where I wanted to switch my other group members due to frustration.
Some parts that I would want to change for next time would probably be the time constraint. Our plan was very thought out before we started building because we took an extra day to think about the design. During the building process, the lever was a major fault so instead of being efficient and dividing work, we all collaborated for a solution. In the end, we were really crunched for time. A lot of the presentation was more on the spot than guided. I also had to finish the PowerPoint on my own time at home, even though I also worked through lunch periods. If we had better time management, we could have drawn a better schematic, been more involved in the PowerPoint, and probably not been as stressed. Another part I would live to improve would be percent of accuracy. Many times during the presentation night, our project didn't work or little things would go wrong, like the dog food spilling all of the floor. Creating more reliable ideas would help this; by taking out the projectile objects, it would increase the rate of success, but I think the catapult was a really awesome achievement and step.
